Dieser Artikel ist noch nicht übersetzt, hier ist die englische Version.
Backups that actually restore: the 3-2-1 rule for a small game community
Every community that has run a server for a year has a story about the world that vanished: a disk that died, a plugin that corrupted the map, an admin who deleted the wrong folder, an account taken over by someone who did it on purpose. The story always ends the same way. Either there was a backup and it worked, or there was a "backup" and it did not.
This article is a small, realistic setup for a group of friends or a small public server, using free tools. It follows the one rule that every backup guide agrees on, and adds the one step most of them mention too briefly: proving that you can restore.
The rule: 3-2-1
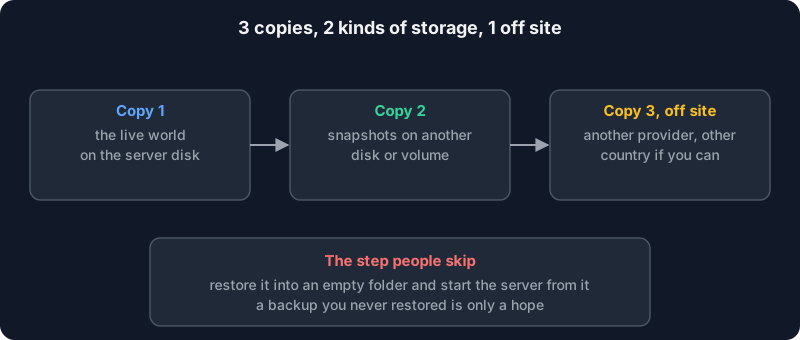
The US cybersecurity agency CISA describes it for small businesses on its page about backing up business data: 3 copies of important files, 2 different types of storage media (like a hard drive and the cloud), and 1 copy stored off-site. It also says to use a combination of on-site and remote backups to protect against threats, hardware failures and physical damage, and to test the backup procedure so that you can restore both fully and partially, and roll back at least seven days.
For a game server it translates like this:
- Copy one is the live world, on the server's disk. It counts as a copy, but it is the one that gets corrupted when something goes wrong.
- Copy two is a snapshot on different storage: another disk, another volume, or your host's backup system. This protects against your own mistakes and against a corrupted world, as long as you keep several generations, not only the latest.
- Copy three is off site: another provider, another building. This protects against the loss of the machine, the account or the provider. If the server and the backups sit in the same place with the same login, one stolen password takes both.
What to back up
Not everything is equally precious. For a Minecraft server:
- Must have: the world folders (
world,world_nether,world_the_endor whatever yourlevel-namesays), the plugin configuration folders, and any database the plugins use. - Useful:
server.properties,whitelist.json,ops.json, the list of plugins with their versions written in a text file. - Not needed: the server jar (download it again), logs, and caches. Leaving them out keeps the backup small, which means you will actually keep more of them.
Other games have the same shape: the saved world or database, the config, and the list of mods. The game's own documentation says where its saves live.
Step 1: take a consistent copy
Copying a folder that a running program is writing to can give you a mix of old and new files. For Minecraft Java, the server has commands for it, documented on the Minecraft wiki:
save-off
save-all flush
save-off disables writing of the world files, and save-all flush writes everything to disk immediately, with a short freeze. Then take your copy, and re-enable saving:
save-on
The wiki notes that the save-off setting is reset when the server restarts, so a crash in the middle of a backup does not leave saving off for good. Do not forget the last command anyway: a server left with saving off for hours loses all that play if it crashes.
Step 2: use a tool that deduplicates and encrypts
Copying the whole world to a new folder every night wastes space. restic takes snapshots, stores each piece of data once, and encrypts the repository, which matters when part of the backup lives at someone else's provider. Install it from your distribution (sudo apt install restic), then create a repository. The same command works for a local folder or for another machine over SFTP, as shown in the restic documentation:
# a repository on another disk
restic init --repo /mnt/backupdisk/mc

# or on another machine, over SSH
restic -r sftp:backup@other-host.example:/srv/restic/mc init
It asks for a password, twice. Read what the documentation says about it: remembering your password is important, because if you lose it you will not be able to access the data in the repository. There is no recovery. Put the password in your password manager and in a sealed envelope if you like, and in a place that does not depend on the server that is being backed up.
Then take a snapshot of the world and configuration:
restic -r /mnt/backupdisk/mc backup /srv/minecraft/world /srv/minecraft/plugins /srv/minecraft/server.properties
The backup page of the documentation lists the options. The first snapshot is as big as the world; the following ones only store what changed, so a daily backup of a large world is often small.
Step 3: automate it, and keep the order
A script that runs from a timer keeps the routine out of your head. Here is the shape of one, for a Minecraft server running in a tmux session named mc:
#!/bin/bash
set -euo pipefail
export RESTIC_REPOSITORY=sftp:backup@other-host.example:/srv/restic/mc
export RESTIC_PASSWORD_FILE=/etc/restic-mc.pass     # root-only, mode 600

trap "tmux send-keys -t mc 'save-on' Enter" EXIT   # saving always comes back on, even if the backup fails

tmux send-keys -t mc 'save-off' Enter
tmux send-keys -t mc 'save-all flush' Enter
sleep 20          # a plain wait; check the console prints that the save finished
restic backup /srv/minecraft/world /srv/minecraft/plugins /srv/minecraft/server.properties
The sleep is a shortcut: it gives the flush time to finish, and in a longer-lived setup you would rather read the server's reply, or use RCON or your panel's API. What matters is the order: stop writing, flush, copy, resume. The trap line makes the last step unconditional: if restic backup fails and set -e stops the script, saving is still switched back on, which is the right way round for a live server. Run the script from cron or a systemd timer, nightly, at the quietest hour.
Step 4: keep several generations, and trim them
A backup of yesterday is useless if the corruption happened three days ago and slipped into every copy since. Keep a rolling set: daily for a week, weekly for a month, monthly for a few months. Restic removes old snapshots with forget, and then reclaims the space with prune:
restic forget --keep-daily 7 --keep-weekly 4 --keep-monthly 6 --prune
Run it after the backup, on the same schedule.
Step 5, the one everybody skips: restore it
CISA's advice is to test that you can restore, and nothing makes it more real than doing it. Once a month, or at least after you set the system up and after every change, restore a snapshot into an empty folder and start a server on it:
restic -r /mnt/backupdisk/mc snapshots
restic -r /mnt/backupdisk/mc restore latest --target /tmp/restore-test
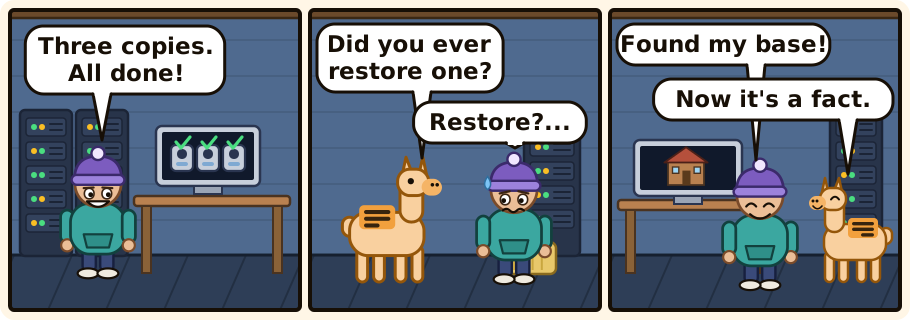
Then point a test copy of the server at /tmp/restore-test, join it, and look for your base. Also check that the repository itself is healthy:
restic -r /mnt/backupdisk/mc check
restic -r /mnt/backupdisk/mc check --read-data-subset=10%
The first command verifies the repository structure. The second reads a random tenth of the data, which catches damaged files over time without downloading everything each night (the documentation notes that a full --read-data reads every pack file and costs bandwidth).
A backup you have never restored is a hope. A backup you restored last month is a fact.
Where to put the third copy
Off site means a different failure domain: not the same provider account, not the same building. For a small community the realistic options are a second hosting provider's storage, a cheap object storage bucket, or a drive kept by a friend in another town and refreshed from time to time. Whatever you pick:
- Encrypt before sending, which restic does.
- Give the backup account write access only, if the storage lets you, so that a stolen server password cannot delete your history.
- Keep the credentials of the backup storage out of the server's own shell history and out of the world's folders.
What your host may already give you
Check what your host does before building everything yourself. On Alama, paid servers get daily backups you can restore yourself from the panel, and every server's files can be downloaded by SFTP at any time, which is how you create your own off-site copy. A host's backups are your second copy; they are still on the same provider, so the third copy is still yours to arrange. You can see the offers on the games page, or try it first on the free Minecraft server.
A weekly routine that costs five minutes
- Look at the log of the last backup run. Did it say it succeeded?
- Look at the number and the dates of the snapshots (
restic snapshots). - Once a month, restore a snapshot into a test folder and start it.
- After each big change (new plugin, new version, new map), take a manual snapshot first.
For the rest of the setup around the server, the Minecraft server guide has the settings and the first 30 minutes on a fresh server has the hardening.