이 글은 아직 번역되지 않았어요. 영어 버전을 보여 드려요.
The first 30 minutes on a fresh Ubuntu LTS server
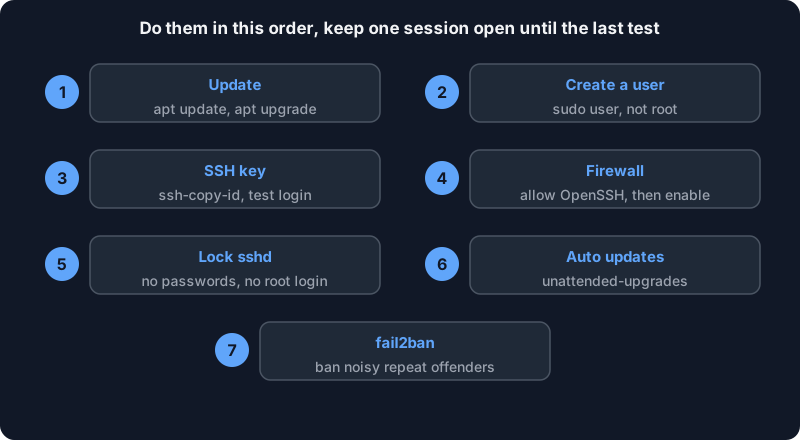
The moment a server gets a public address, strangers start knocking on it. Nobody targets you personally: automated scanners walk the whole Internet, trying the common doors with the common passwords. Look at /var/log/auth.log on any fresh machine after an hour and you will see them. This guide is what we would do in the first half hour, in the order that avoids locking yourself out.
It targets Ubuntu Server LTS. The current one is Ubuntu 26.04 LTS, released in April 2026 and supported for five years, until April 2031 according to the official release notes. The same steps work on 24.04. Start with an LTS, not an interim release: you want years of security updates, not nine months.
Before you start: keep two terminals
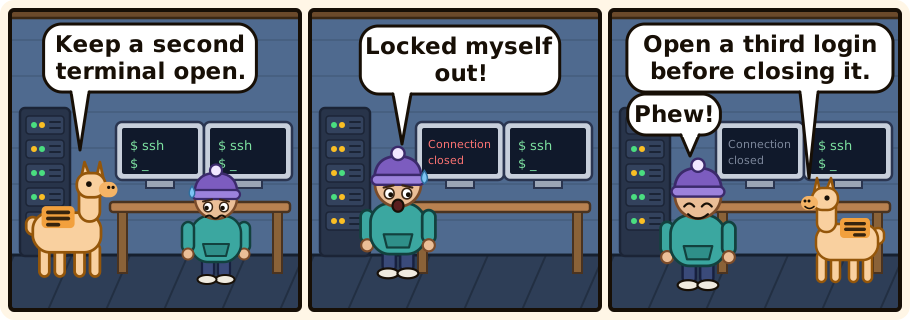
Every step that changes how you log in has the same failure mode: you break it, and the only way in was the session you just closed. So open two SSH sessions to the server. Use the first to make changes and the second, left untouched, as a lifeline. Only close it when a brand new third login has worked. Most hosts also give a web console that works without SSH; know where yours is before you need it.
1. Update everything
sudo apt update
sudo apt upgrade
A fresh image can be weeks or months old. If the upgrade replaced the kernel, the machine tells you a reboot is needed (the file /var/run/reboot-required exists). Do it now, while nothing depends on the server yet.
2. Create a normal user with sudo
Working as root means every typo is a disaster and every log line says "root". Create a user instead:
sudo adduser alice
sudo usermod -aG sudo alice
Replace alice with your own name. Do not log in as that user yet: first it needs a key.
3. Log in with an SSH key
A key cannot be guessed by a scanner; a password can. The Ubuntu OpenSSH documentation recommends an ed25519 key. On your own computer, not the server:
ssh-keygen -t ed25519
ssh-copy-id alice@your-server-address
Give the private key a passphrase. Then test, in a new terminal:
ssh alice@your-server-address
sudo whoami
If you get in without being asked for the account's password (a passphrase prompt belongs to your key, not to the server) and sudo whoami prints root, step 3 works. The documentation also notes that file permissions matter: authorized_keys should not be writable by other users, or the server may refuse to trust it.
4. Turn on the firewall, SSH first
The Ubuntu firewall guide uses ufw, and warns about the one thing that matters: enabling it over SSH without allowing SSH first cuts you off. In this order:
sudo ufw default deny incoming
sudo ufw allow OpenSSH
sudo ufw enable
sudo ufw status verbose
From now on, nothing from outside reaches the server unless you open it. When you install a web server or a game server, open its port at that moment (sudo ufw allow 25565/tcp for a Minecraft server, for example), and no earlier. A firewall like this does not limit what the machine can reach on the way out, which is a separate question that we come back to in why free game servers get abused.
5. Lock down sshd, and prove it worked
Now that keys work, disable passwords and root login. The documentation says to validate the configuration before restarting. One practical trap: Ubuntu reads the files in /etc/ssh/sshd_config.d/ in alphabetical order, and for most options the first value read wins. Some cloud images ship a file such as 50-cloud-init.conf that sets PasswordAuthentication yes. If your file is called 99-hardening.conf, it loses. Name yours so that it sorts first:
printf 'PasswordAuthentication no\nPermitRootLogin no\n' | sudo tee /etc/ssh/sshd_config.d/01-hardening.conf
sudo sshd -t
sudo systemctl restart ssh
Then do not trust the file, ask the daemon what it actually uses:
sudo sshd -T | grep -i -E 'passwordauthentication|permitrootlogin'
You want to see passwordauthentication no and permitrootlogin no. Now open a third terminal and log in again. Only then close the lifeline.
Should you move SSH to another port? It cuts log noise, and nothing else: a scanner finds any port in seconds. It is not security, and on recent Ubuntu releases the SSH service can be started through a systemd socket, so changing the port takes more than editing one line. Skip it unless you have a reason.
6. Automatic security updates
According to the Ubuntu documentation, the unattended-upgrades package is installed by default on Ubuntu Server, and /etc/apt/apt.conf.d/20auto-upgrades controls it. Check that it contains:
APT::Periodic::Update-Package-Lists "1";
APT::Periodic::Unattended-Upgrade "1";
Test the configuration without changing anything:
sudo unattended-upgrade -v --dry-run
Automatic reboots are off unless you enable them (Unattended-Upgrade::Automatic-Reboot in /etc/apt/apt.conf.d/50unattended-upgrades), so a kernel update waits for you to reboot. On a game server a reboot kicks every player, so turn automatic reboots on only on purpose, with a time that suits your players.
7. fail2ban, for what it is good at
fail2ban reads log files and, when an address fails to authenticate too often, adds a firewall rule that rejects it for a while. Install it and look at the SSH jail:
sudo apt install fail2ban
sudo fail2ban-client status sshd
Put your own settings in /etc/fail2ban/jail.local rather than editing jail.conf, which package updates may replace. Be realistic about what it does. With password login disabled, guessing a password cannot succeed anyway, so the main benefit is a quieter log and less wasted CPU. The project says it itself: it reduces failed attempts but cannot remove the risk of weak authentication. Keys are the real protection; fail2ban is tidiness.
What a honeypot on port 22 teaches
If you are curious about who is knocking, a honeypot answers the question safely. Cowrie is an SSH and Telnet honeypot that pretends to be a Unix system and records the credentials tried, the commands typed, and the files an intruder tries to download. Run it on an isolated machine that holds nothing of yours, and keep your real SSH access somewhere it cannot be confused with it.
What people usually report from such logs is unglamorous, and that is the lesson. These are common observations from honeypot operators, not measurements of ours:
- The passwords tried are the obvious ones, like
admin,123456orroot. The attacks are cheap and broad, not clever. - After a "successful" login, the first commands are often the same: look at the machine, then download and run a script. That script is the payload, and the file is worth keeping and sharing with people who analyse malware.
- The goal is rarely your data. It is your machine's processor and network: mining, relaying traffic, scanning other people.
That last point is the one that matters to any hosting company. We wrote up a real case in Two free servers, one proxy operator.
The result, in one list
- A normal user with sudo, key login only, no root login, verified with
sshd -T. - A firewall that denies incoming traffic except what you opened.
- Security updates that install themselves.
- A quieter log.
Half an hour, no cost, and the server is no longer the easy target. If you would rather start from a machine that is already managed, a game server or bot on Alama removes this whole chapter, at the price of not having root on the machine.